Designing Your Treated Pine Retaining Wall
Proper
design is crucial for a durable and effective treated pine retaining wall. We'll explore key considerations for location, drainage, and material specifications to ensure your wall stands the test of time.
Location and Layout
Careful planning of your retaining wall's location and layout is essential. We recommend starting with a thorough site assessment to determine soil conditions and natural slope. Consider property boundaries and local regulations that may affect placement.
Sketch out the wall's path, noting any curves or corners. For walls over 1 metre high, consult an engineer to ensure structural integrity. Mark out the wall's footprint on the ground, allowing extra space for drainage behind the structure.
Drainage Solutions
Proper drainage is vital to prevent water pressure buildup behind your treated pine retaining wall. We always include an ag drain at the base of the wall. This perforated pipe collects and directs water away from the structure.
Install a layer of gravel behind the wall, extending from the base to near the top. This creates a drainage column that allows water to flow freely to the ag drain. For added protection, consider a geotextile fabric to prevent soil from clogging the drainage system.
Material Specifications
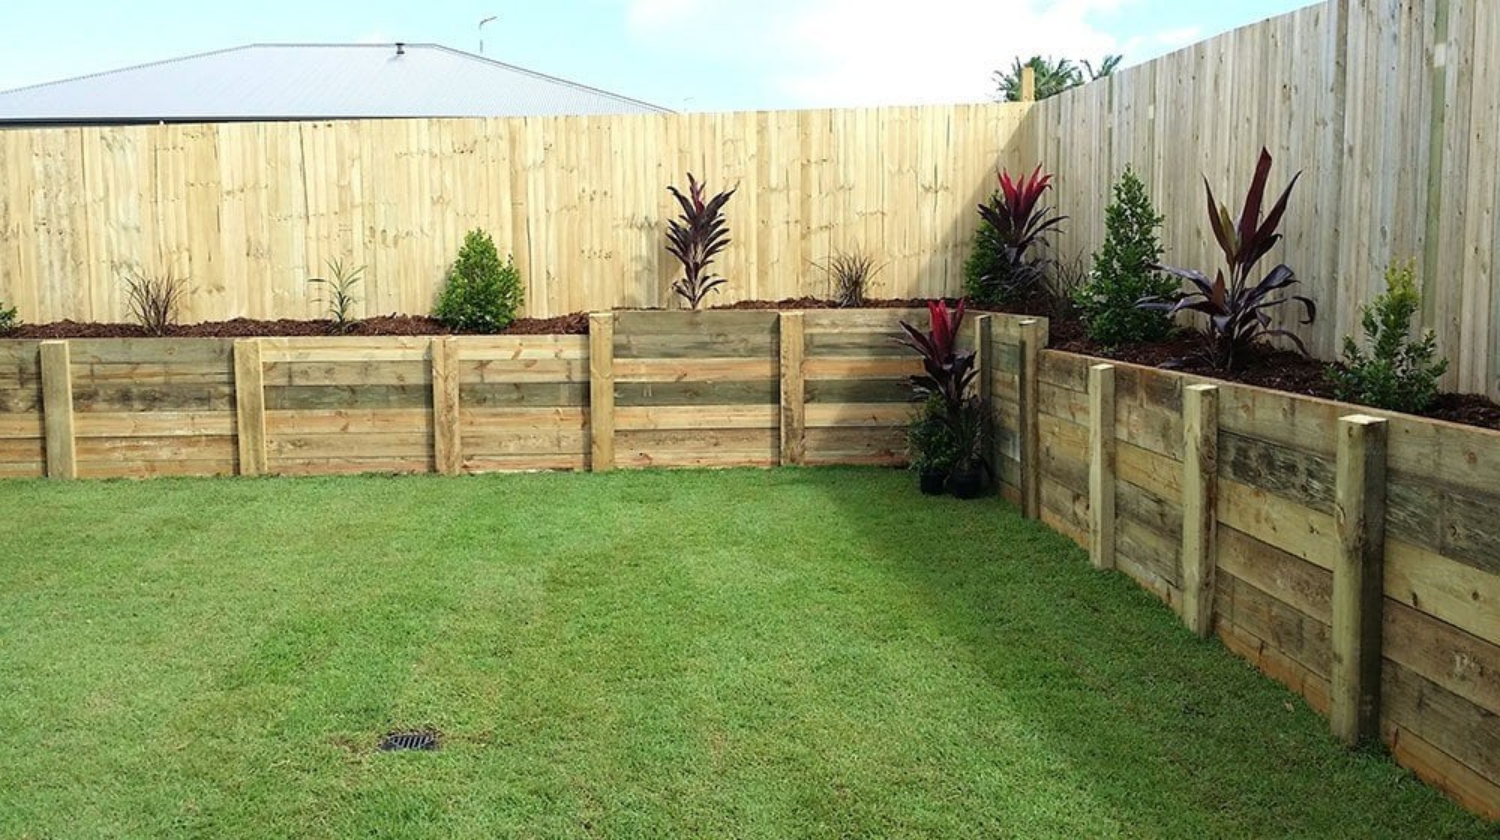
Selecting the right materials is crucial for a long-lasting treated pine retaining wall. We use H4-treated pine for in-ground posts and H3-treated pine for above-ground components. These treatments protect against decay and insect attack.
For walls up to 600mm high, 100x75mm posts and 200x50mm sleepers are typically sufficient. Taller walls, around 1400mm, require larger 200x75mm posts and 200x75mm sleepers. Always use galvanised fasteners to prevent corrosion.
Proper backfilling is essential. Use a mix of gravel and compacted soil behind the wall, leaving the top layer loose for planting if desired.
Installation Process
Our expert team at
Canberra Retaining Wall Pros
follows a meticulous process to ensure your treated pine retaining wall is built to last. We prioritise quality and precision at every step, from initial site preparation to final backfilling.
Site Preparation
We begin by marking out the wall's location and excavating the area. Our team removes any vegetation, roots, or debris that could interfere with the wall's stability. We then level the ground, ensuring a solid foundation for your retaining wall.
Next, we install a drainage system behind the proposed wall location. This typically involves laying a perforated pipe surrounded by gravel to redirect water away from the wall's base. Proper drainage is crucial for preventing water pressure build-up and extending the life of your treated pine retaining wall.
Building the Base
A sturdy base is essential for a long-lasting retaining wall. We start by digging a trench along the marked line, typically about 150mm deep and 300mm wide. The trench is then filled with compacted road base or crushed rock.
We use a spirit level to ensure the base is perfectly level across its entire length. For taller walls, we may need to step the base to accommodate changes in ground level. This meticulous approach guarantees a solid foundation for your treated pine sleepers.
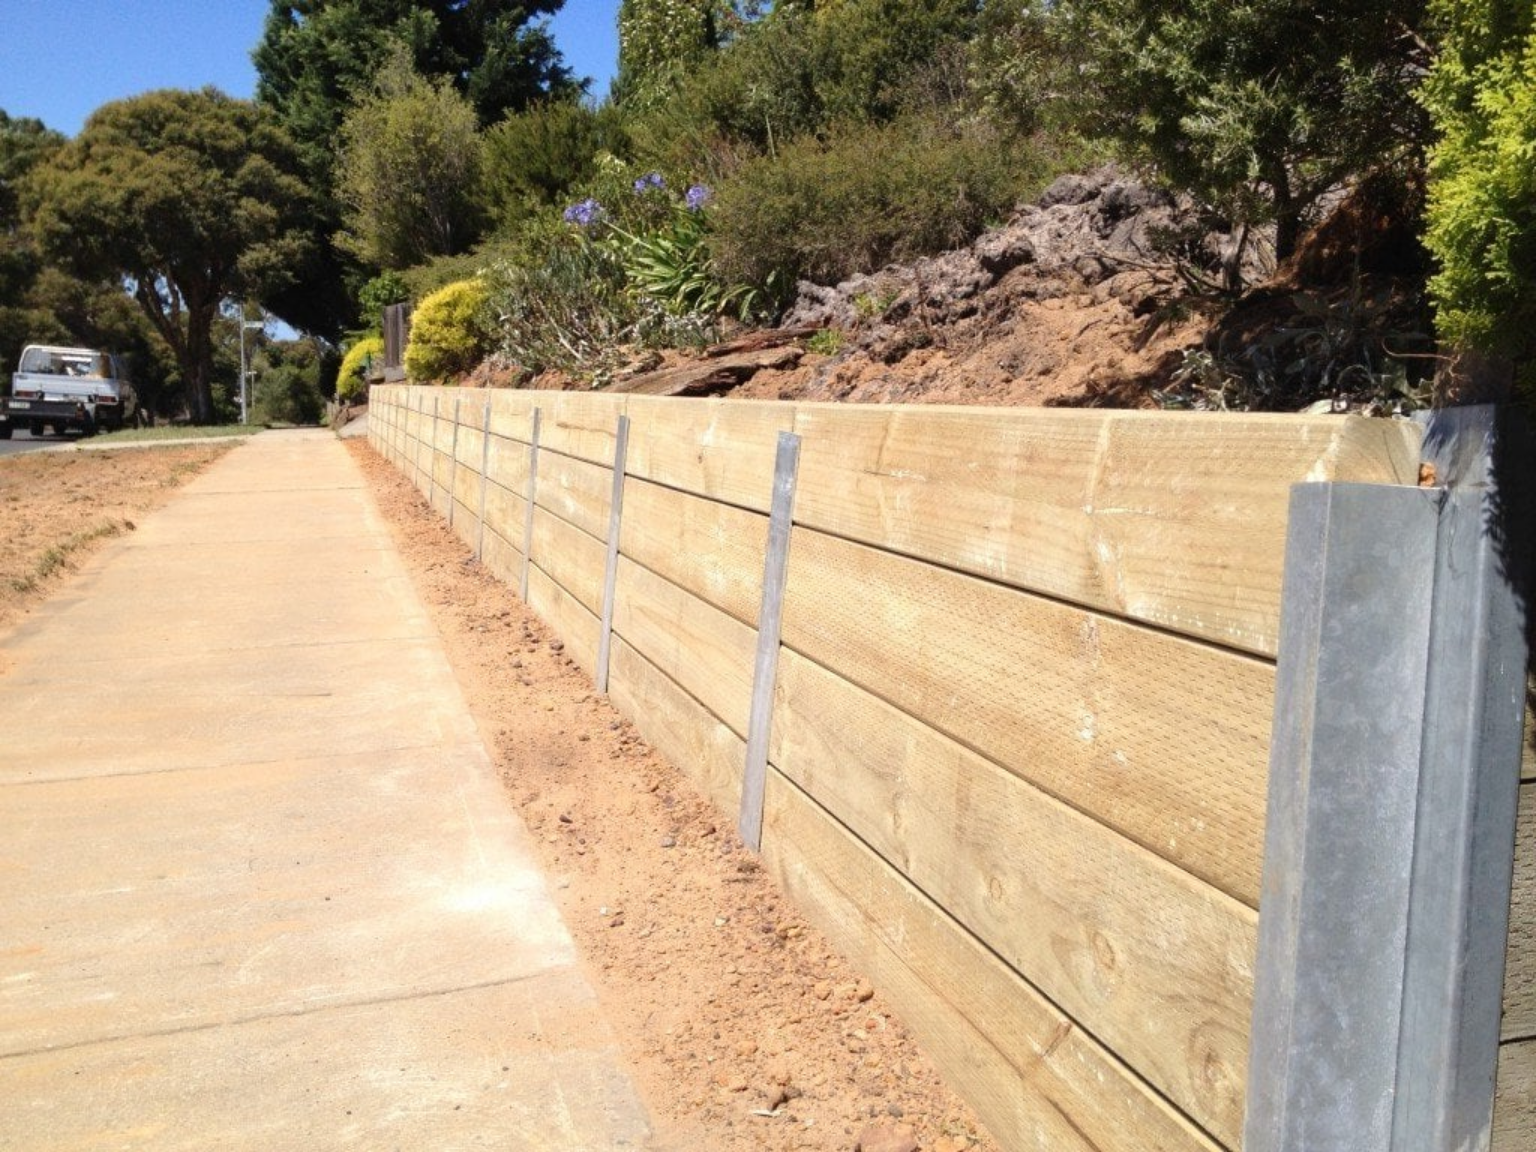
Erecting the Retaining Wall
With the base prepared, we begin installing the treated pine sleepers. We start with the first row, ensuring it's level and straight. Each subsequent row is secured to the one below using galvanised screws or nails.
For walls over 1 metre high, we install vertical support posts at regular intervals. These posts are set in concrete footings for added stability. We use a string line to maintain a straight edge along the wall's face as we build upwards.
Corners and ends require special attention. We interlock the sleepers at these points for added strength and a professional finish. Throughout the process, we regularly check for level and plumb to ensure your wall remains straight and true.
Backfilling Techniques
Once the wall is erected, we begin the crucial backfilling process. We start by laying a layer of geotextile fabric against the back of the wall. This prevents soil from washing through gaps between the sleepers.
We then add a layer of gravel directly behind the wall, typically about 300mm wide. This acts as additional drainage, allowing water to flow down to the base drainage system. We compact this gravel in layers to ensure stability.
Finally, we backfill with soil, compacting in layers of about 200mm. For taller walls, we may incorporate additional drainage layers as we backfill. The top layer is usually topsoil, ready for planting or turfing as desired.